Chocolate Pinecone Cookies
Chocolate Pinecone Cookies
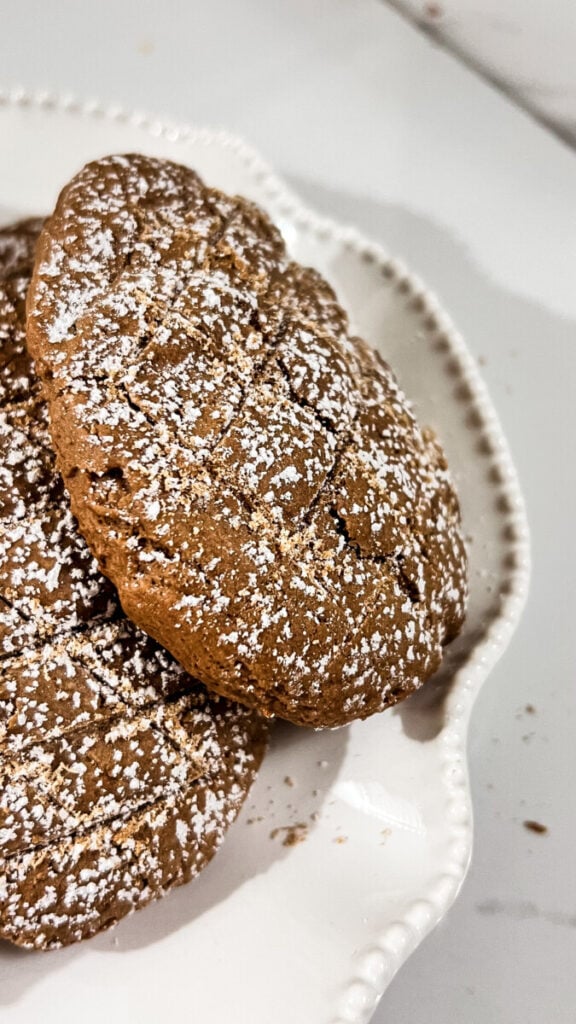
These Chocolate Pinecone Cookies are almost too pretty to eat! Made with rich chocolate cookie dough, melted chocolate, and crunchy chocolate cereal, these adorable Christmas cookies look just like little pinecones dusted with freshly fallen snow.
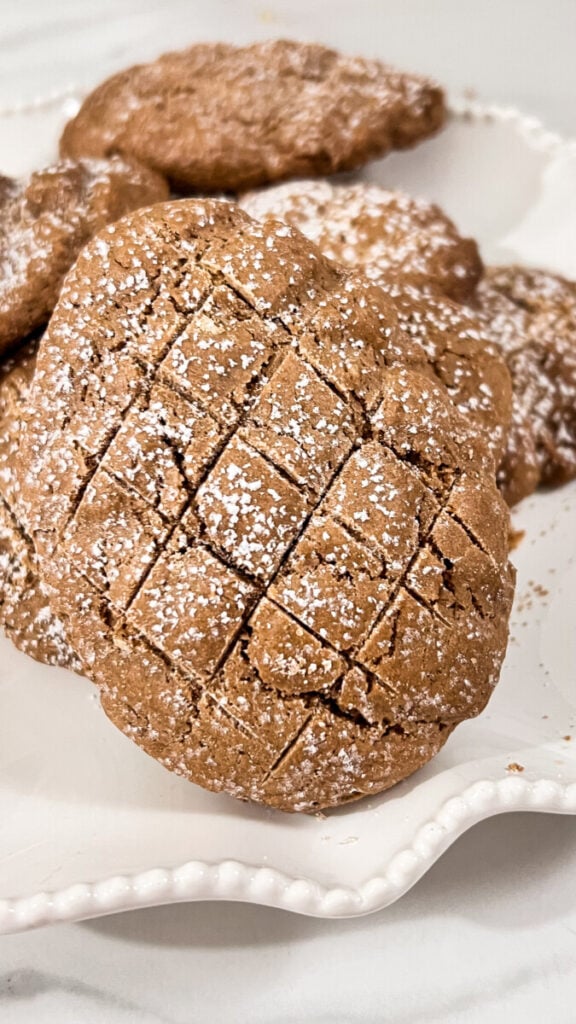
They’re the perfect combination of a soft, fudgy chocolate cookie and a crunchy chocolate coating. Each cookie is shaped into a pinecone, decorated with overlapping chocolate cereal pieces, and finished with a delicate dusting of powdered sugar.
If you’re looking for unique Christmas cookie ideas, festive holiday desserts, or beautiful homemade cookies for a Christmas cookie tray, these Chocolate Pinecone Cookies are such a fun recipe to make.
They look especially beautiful arranged on a white serving platter with fresh rosemary sprigs, sugared cranberries, or other Christmas cookies.
And while these little pinecones look intricate, they’re surprisingly simple to decorate!
The secret is using chocolate cereal pieces to create the overlapping scales of a real pinecone.
Once the cookies are decorated and dusted with powdered sugar, they look like tiny pinecones gathered from a snowy winter forest.
They’re wonderful for Christmas parties, holiday cookie exchanges, winter birthdays, homemade gifts, and festive dessert tables.
Why You’ll Love These Chocolate Pinecone Cookies
- Adorable Christmas design: These cookies look like miniature pinecones covered in snow.
- Rich chocolate flavor: Chocolate cookie dough and melted chocolate create a delicious double-chocolate treat.
- Fun to decorate: Chocolate cereal pieces make the pinecone design easy to create.
- Beautiful presentation: Perfect for Christmas cookie platters and holiday dessert boards.
- Kid-friendly decorating: Children can help arrange the chocolate cereal scales.
- Make-ahead friendly: The cookies can be baked in advance and decorated later.
- Perfect for gifting: A unique addition to homemade Christmas cookie boxes.
- No complicated piping: You don’t need royal icing or special decorating equipment.
Chocolate Pinecone Cookies Recipe
Prep Time: 30 minutes
Chill Time: 30 minutes
Bake Time: 10–12 minutes
Decorating Time: 30–45 minutes
Total Time: Approximately 2 hours, including cooling
Servings: 18–20 pinecone cookies
Ingredients
Chocolate Cookie Dough
- 1/2 cup unsalted butter, softened
- 3/4 cup granulated sugar
- 1 large egg
- 1 teaspoon vanilla extract
- 1 1/2 cups all-purpose flour
- 1/3 cup unsweetened cocoa powder
- 1/2 teaspoon baking powder
- 1/4 teaspoon salt
- 1–2 Tablespoons milk, only if needed
Chocolate Pinecone Decorations
- 1 1/2 cups semisweet chocolate chips
- 1 teaspoon coconut oil or vegetable shortening, optional
- 3–4 cups chocolate-flavored cornflake-style cereal
- 1/4 cup powdered sugar, for dusting
How to Make Chocolate Pinecone Cookies
Step 1: Cream the Butter and Sugar
Place the softened butter and granulated sugar in a large mixing bowl.
Using a hand mixer or stand mixer, beat until light and creamy, approximately 2 minutes.
Scrape down the sides of the bowl as needed.
Step 2: Add the Egg and Vanilla
Add the egg and vanilla extract.
Beat until smooth and completely combined.
Step 3: Combine the Dry Ingredients
In a separate bowl, whisk together the flour, cocoa powder, baking powder, and salt.
Make sure the cocoa powder is evenly distributed throughout the flour.
Step 4: Make the Chocolate Cookie Dough
Gradually add the dry ingredients to the butter mixture.
Mix on low speed until a soft chocolate cookie dough forms.
The dough should be firm enough to shape without sticking excessively to your hands.
If it seems too dry or crumbly, add milk 1 teaspoon at a time until the dough comes together.
Avoid adding too much milk because the cookies need to hold their pinecone shape during baking.
Step 5: Chill the Dough
Cover the cookie dough and refrigerate for approximately 30 minutes.
Chilling makes the dough easier to shape and helps reduce spreading during baking.
Step 6: Preheat the Oven
Preheat the oven to 350°F.
Line two large baking sheets with parchment paper.
Step 7: Shape the Pinecone Cookies
Scoop approximately 1 1/2 Tablespoons of chocolate cookie dough for each cookie.
Roll the dough into an oval shape.
Gently taper one end to create a pinecone or teardrop shape.
Flatten the bottom slightly so the cookie sits securely on the baking sheet.
The cookies should be approximately 2 1/2–3 inches long.
Arrange the shaped cookies approximately 2 inches apart on the prepared baking sheets.
Step 8: Bake the Cookies
Bake at 350°F for approximately 10–12 minutes.
The cookies should appear set around the edges but still be slightly soft in the center.
Avoid overbaking, as the cookies will continue firming up while cooling.
Step 9: Cool Completely
Remove the cookies from the oven.
Allow them to cool on the baking sheets for approximately 5 minutes.
Carefully transfer to a wire cooling rack and cool completely.
The cookies must be completely cool before decorating.
How to Decorate Chocolate Pinecone Cookies
Step 1: Melt the Chocolate
Place the semisweet chocolate chips in a microwave-safe bowl.
Add the optional coconut oil or vegetable shortening if desired.
Microwave in 20-second intervals, stirring thoroughly between each interval, until the chocolate is completely melted and smooth.
Be careful not to overheat the chocolate.
Step 2: Coat the Cookies
Using a small spoon or offset spatula, spread a thin layer of melted chocolate over the top and sides of each cooled cookie.
Work with one cookie at a time so the chocolate doesn’t harden before the cereal is added.
The melted chocolate acts as the glue that holds the pinecone scales in place.
Step 3: Add the Chocolate Cereal
Beginning at the wider end of each cookie, gently press individual chocolate cereal flakes into the melted chocolate.
Arrange the cereal pieces in slightly overlapping rows.
Continue working toward the narrow end of the cookie.
Angle the cereal pieces slightly upward to create the appearance of natural pinecone scales.
For the prettiest pinecones, stagger each row so the cereal pieces overlap rather than lining up in straight columns.
Step 4: Shape the Pinecone Tip
Use smaller cereal pieces near the tapered end of each cookie.
Press them gently into the chocolate to create a pointed pinecone tip.
The finished cookie should resemble a miniature pinecone with overlapping chocolate scales.
Step 5: Allow the Chocolate to Set
Place the decorated cookies on a parchment-lined tray.
Allow the chocolate to set completely at cool room temperature.
If needed, refrigerate the cookies briefly for approximately 10–15 minutes to help the chocolate firm up.
Step 6: Dust with Powdered Sugar
Once the chocolate has set, place a small amount of powdered sugar in a fine-mesh sieve.
Lightly dust the tops of the pinecone cookies.
The powdered sugar creates the beautiful appearance of freshly fallen snow.
Be careful not to add too much powdered sugar, as you still want the chocolate pinecone design to show through.
Step 7: Serve and Enjoy
Arrange the finished Chocolate Pinecone Cookies on a decorative serving platter.
For a beautiful Christmas presentation, surround the cookies with fresh rosemary sprigs or other festive decorations, keeping any nonedible greenery separate from the cookies.
Serve and enjoy!
What Are Chocolate Pinecone Cookies?
Chocolate Pinecone Cookies are festive holiday cookies designed to look like miniature pinecones.
They’re made with a rich chocolate cookie base that’s shaped into an oval or teardrop.
After baking, the cookies are coated with melted chocolate and decorated with individual pieces of chocolate cereal.
The cereal creates overlapping layers that resemble the scales of a real pinecone.
A light dusting of powdered sugar gives the finished cookies a beautiful snowy appearance.
These decorative chocolate cookies are especially popular for Christmas baking, winter celebrations, and woodland-themed dessert tables.
What Do Chocolate Pinecone Cookies Taste Like?
These cookies have a delicious combination of rich chocolate flavor and contrasting textures.
The chocolate cookie base is soft and slightly fudgy, with a buttery cocoa flavor.
The melted chocolate adds another layer of richness.
The chocolate cereal provides a delicate crunch that makes every bite especially delicious.
And the powdered sugar adds a touch of sweetness without overwhelming the chocolate.
The combination creates a wonderful chocolate Christmas cookie that’s both beautiful and delicious.
How to Make Cookies Look Like Real Pinecones
The secret to realistic Chocolate Pinecone Cookies is the arrangement of the chocolate cereal pieces.
Start with an oval-shaped chocolate cookie that has one slightly tapered end.
Spread melted chocolate over the cookie.
Then arrange the chocolate cereal flakes in overlapping rows, beginning at the wider end.
Stagger each row and angle the cereal pieces slightly outward.
This creates the natural layered appearance of pinecone scales.
Use larger cereal pieces toward the wider end and smaller pieces near the tip.
Finish with a light dusting of powdered sugar for a snowy woodland appearance.
What Kind of Cereal Works Best?
Chocolate-flavored cornflake-style cereal works especially well because the individual flakes are thin and slightly curved.
Their shape makes them easy to overlap like pinecone scales.
Choose cereal with pieces large enough to create a visible layered pattern.
You can also use plain cornflakes coated in melted chocolate, although this requires an additional decorating step.
Avoid very small round cereal pieces because they won’t create the same realistic pinecone appearance.
Why Chill the Cookie Dough?
Chilling the chocolate cookie dough helps the cookies hold their shape during baking.
Because these cookies are shaped into little pinecones, it’s important that they don’t spread too much.
Chilling also makes the dough easier to handle and shape.
If the dough becomes too soft while working, return it to the refrigerator for a few minutes before continuing.
Tips for the Best Chocolate Pinecone Cookies
Use softened butter. Softened butter creams smoothly with the sugar.
Measure the flour carefully. Too much flour can make the dough dry and crumbly.
Chill the dough. This helps the cookies hold their pinecone shape.
Make the cookies similar in size. Evenly sized cookies bake more consistently.
Don’t overbake. The cookies should remain soft in the center.
Cool completely before decorating. Warm cookies can cause the chocolate coating to slide off.
Use thin cereal flakes. They create the most realistic pinecone scales.
Work one cookie at a time. This keeps the melted chocolate soft enough to hold the cereal.
Overlap the cereal pieces. Staggered rows create a natural pinecone appearance.
Use smaller pieces near the tip. This gives each cookie a beautiful tapered shape.
Dust lightly with powdered sugar. A little powdered sugar creates a lovely snowy effect.
Chocolate Pinecone Cookie Variations
Dark Chocolate Pinecone Cookies
Use dark chocolate chips for the coating and dark cocoa powder in the cookie dough.
Milk Chocolate Pinecone Cookies
Use milk chocolate chips for a sweeter chocolate flavor.
Chocolate Peppermint Pinecone Cookies
Add 1/4 teaspoon peppermint extract to the cookie dough for a festive chocolate mint flavor.
Mocha Pinecone Cookies
Add 1 teaspoon instant espresso powder to the dry ingredients for a rich chocolate coffee flavor.
Snowy White Chocolate Pinecones
Drizzle a small amount of melted white chocolate over the decorated pinecones before dusting with powdered sugar.
Chocolate Orange Pinecone Cookies
Add 1 teaspoon finely grated orange zest to the cookie dough for a delicious chocolate orange flavor.
Mini Chocolate Pinecone Cookies
Use approximately 1 Tablespoon of dough per cookie to create smaller pinecones.
Reduce the baking time slightly and begin checking for doneness after approximately 8 minutes.
How to Decorate Chocolate Pinecone Cookies for Christmas
These cookies are especially beautiful on a Christmas dessert platter.
Arrange them on a white ceramic plate or cake stand to make the dark chocolate pinecones stand out.
Add fresh rosemary sprigs around the platter to create the appearance of evergreen branches.
A few sugared cranberries can add a beautiful pop of red.
For an elegant Christmas presentation, combine the pinecone cookies with snowflake sugar cookies, gingerbread cookies, and white chocolate treats.
The combination of dark chocolate, snowy powdered sugar, and festive greenery creates a beautiful woodland-inspired holiday display.
Can You Make Chocolate Pinecone Cookies Ahead of Time?
Yes!
The chocolate cookie bases can be baked one or two days before decorating.
Allow the cookies to cool completely.
Store them in an airtight container at room temperature.
When ready to decorate, melt the chocolate and attach the cereal pieces.
For the freshest appearance, dust the cookies with powdered sugar shortly before serving.
How to Store Chocolate Pinecone Cookies
Store the finished cookies in an airtight container at cool room temperature for approximately 3–4 days.
Place parchment paper between layers if necessary.
For the best appearance, avoid stacking the cookies too tightly because the cereal scales can break.
Keep the cookies away from heat and direct sunlight to prevent the chocolate from softening.
If your kitchen is particularly warm, the cookies can be refrigerated in an airtight container, although condensation may affect the powdered sugar and cereal texture.
Can You Freeze Chocolate Pinecone Cookies?
The undecorated chocolate cookies freeze well.
Allow them to cool completely.
Place them in a freezer-safe container with parchment paper between layers.
Freeze for up to 2 months for best quality.
Thaw at room temperature before decorating.
Freezing the fully decorated cookies isn’t recommended because the chocolate cereal can lose its crisp texture and the powdered sugar may dissolve after thawing.
Frequently Asked Questions
What Are Chocolate Pinecone Cookies?
Chocolate Pinecone Cookies are festive chocolate cookies decorated with melted chocolate and overlapping chocolate cereal pieces to resemble real pinecones.
Are Chocolate Pinecone Cookies Difficult to Make?
No! Although they look intricate, they’re easy to decorate using chocolate cereal and melted chocolate.
What Cereal Do You Use for Pinecone Cookies?
Chocolate-flavored cornflake-style cereal works best because the thin flakes resemble pinecone scales.
Can I Use Regular Cornflakes?
Yes. Plain cornflakes can be used, although they won’t have the same dark chocolate appearance unless coated in chocolate.
Can I Make the Cookie Dough Ahead of Time?
Yes. The dough can be refrigerated for up to 2 days before baking.
Do I Need a Special Cookie Cutter?
No. The cookies are shaped by hand into small ovals or teardrops.
Can I Use Milk Chocolate?
Absolutely. Milk chocolate creates a sweeter flavor.
Can I Use Dark Chocolate?
Yes. Dark chocolate is delicious and creates a beautiful deep brown pinecone color.
Why Are My Cookies Spreading?
The dough may have become too warm before baking. Chill the shaped cookies for an additional 10–15 minutes if necessary.
How Do I Keep the Cereal from Falling Off?
Make sure the cereal pieces are pressed gently into the melted chocolate before it sets.
Can Kids Help Decorate These Cookies?
Yes! Children can help arrange the chocolate cereal pieces and dust the finished cookies with powdered sugar.
How Do I Make the Pinecones Look Snowy?
Lightly dust the finished cookies with powdered sugar using a fine-mesh sieve.
Can I Make Mini Pinecone Cookies?
Yes. Use smaller portions of cookie dough and smaller cereal pieces to create miniature pinecones.
More Christmas Cookie Ideas
If you love these Chocolate Pinecone Cookies, try these other festive holiday treats:
- Snowflake Sugar Cookies
- Christmas Tree Sugar Cookies
- Hot Cocoa Cookies
- Gingerbread Cookies
- Chocolate Crinkle Cookies
- Reindeer Cookies
- Christmas Ornament Cookies
- Snowman Sugar Cookies
- Peppermint Chocolate Cookies
- Christmas Wreath Cookies
- Chocolate-Dipped Shortbread Cookies
- Christmas Tree Brownies
Final Thoughts
These Chocolate Pinecone Cookies are a beautiful and delicious addition to any Christmas cookie tray.
Made with rich chocolate cookie dough, melted chocolate, crunchy chocolate cereal, and a dusting of powdered sugar, these adorable cookies look just like miniature pinecones covered in snow.
They’re perfect for Christmas parties, holiday cookie exchanges, winter gatherings, and homemade Christmas gifts.
Whether you’re looking for unique Christmas cookie ideas, festive chocolate desserts, or beautiful woodland-inspired holiday treats, these Chocolate Pinecone Cookies are a wonderful recipe to make.