Standing Ghost Halloween Cookies
Standing Ghost Halloween Cookies
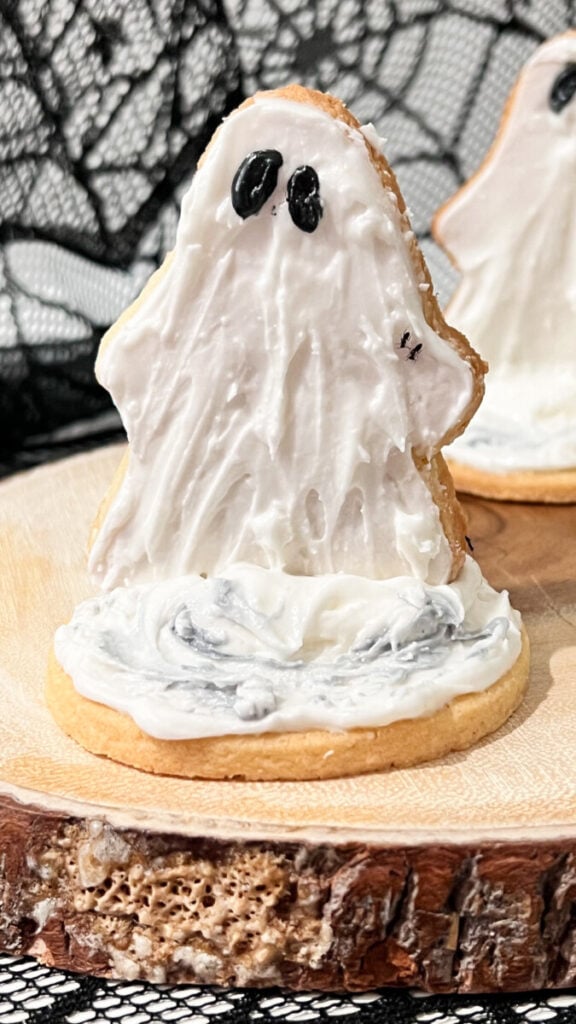
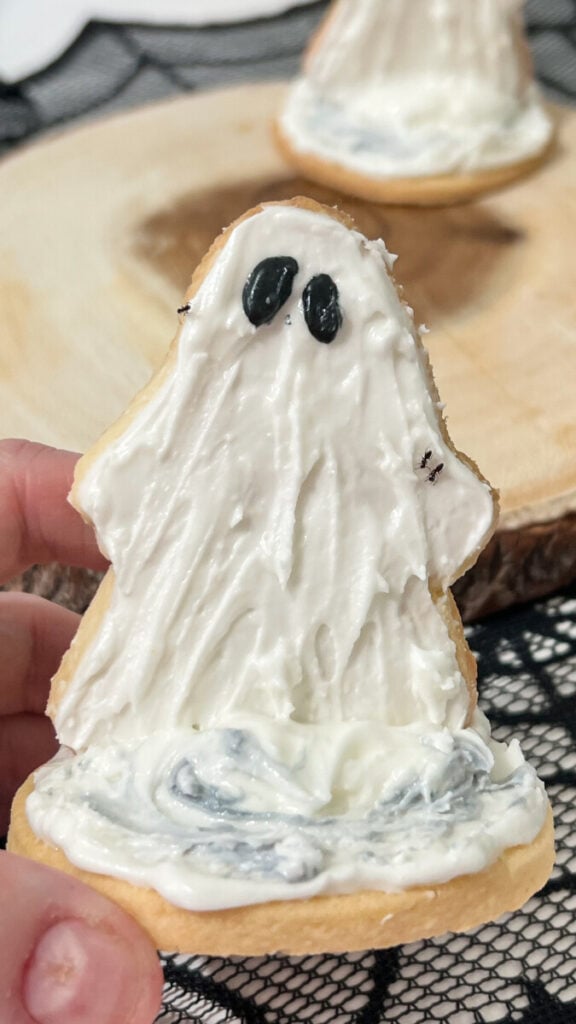
These adorable Standing Ghost Halloween Cookies are one of my favorite Halloween cookie decorating ideas because they literally stand up on their own! Made with a simple ghost-shaped sugar cookie attached to a round cookie base, these three-dimensional treats become the perfect centerpiece for Halloween dessert tables, parties, cookie boxes, and spooky celebrations.
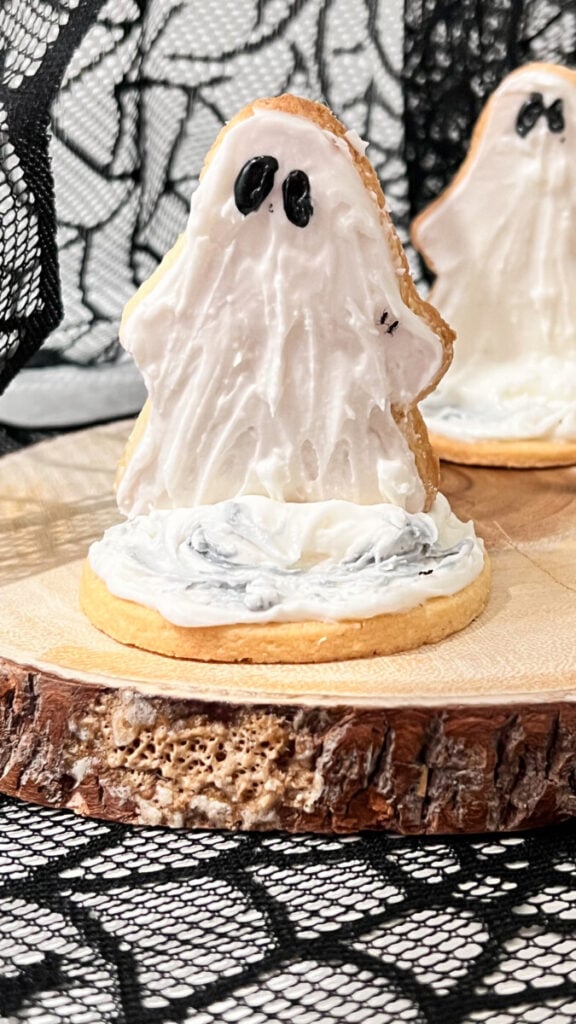
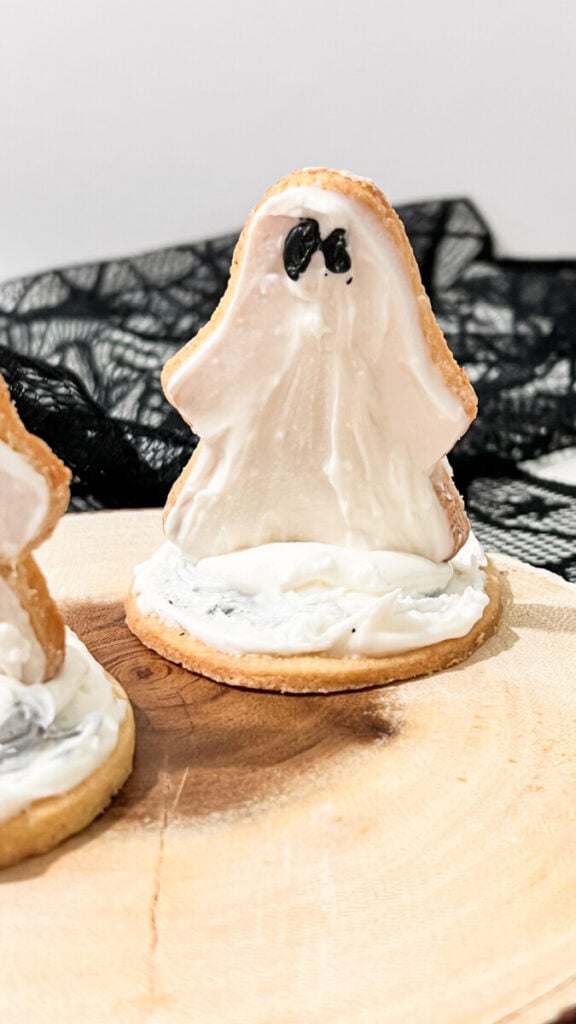
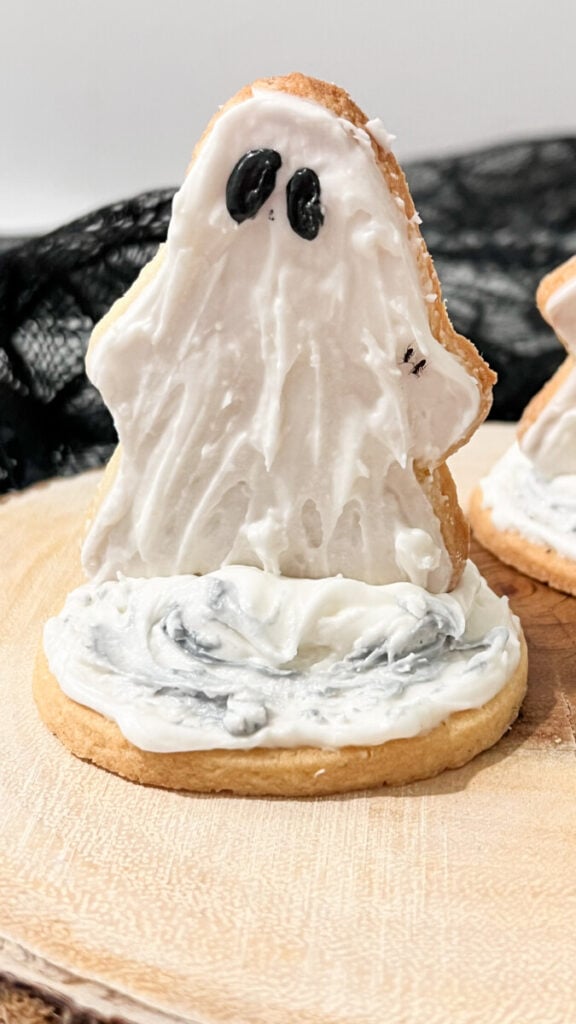
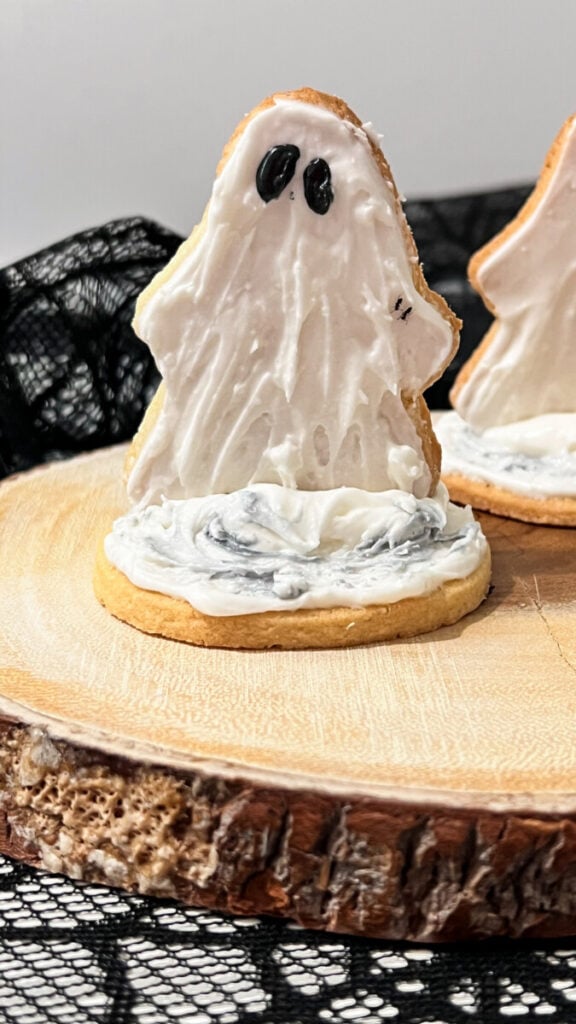
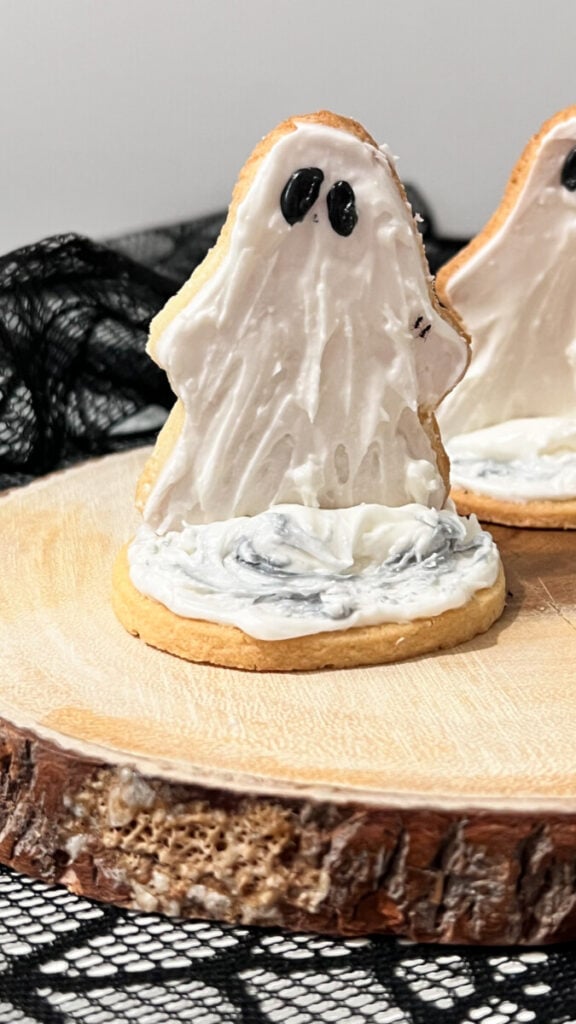
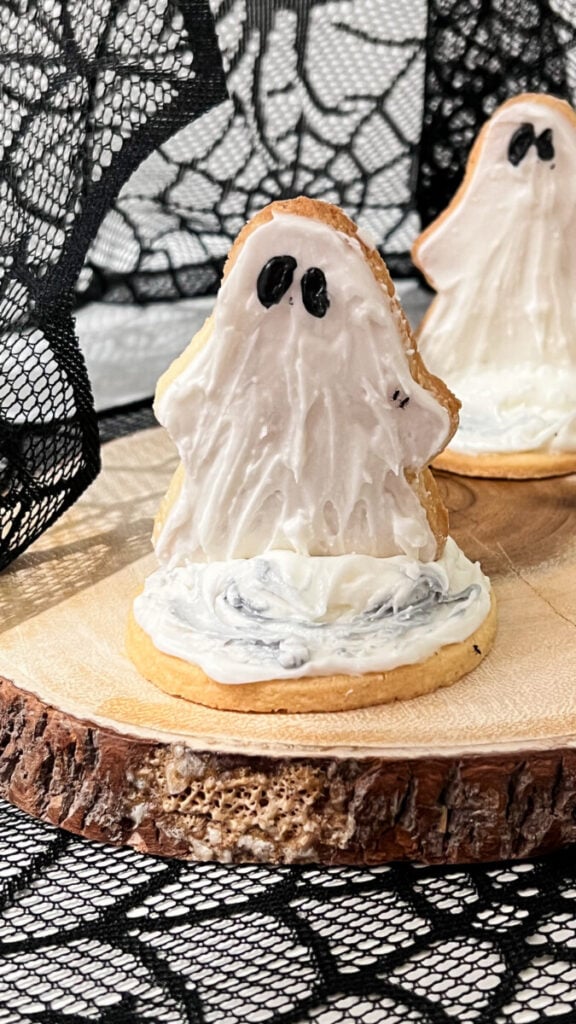
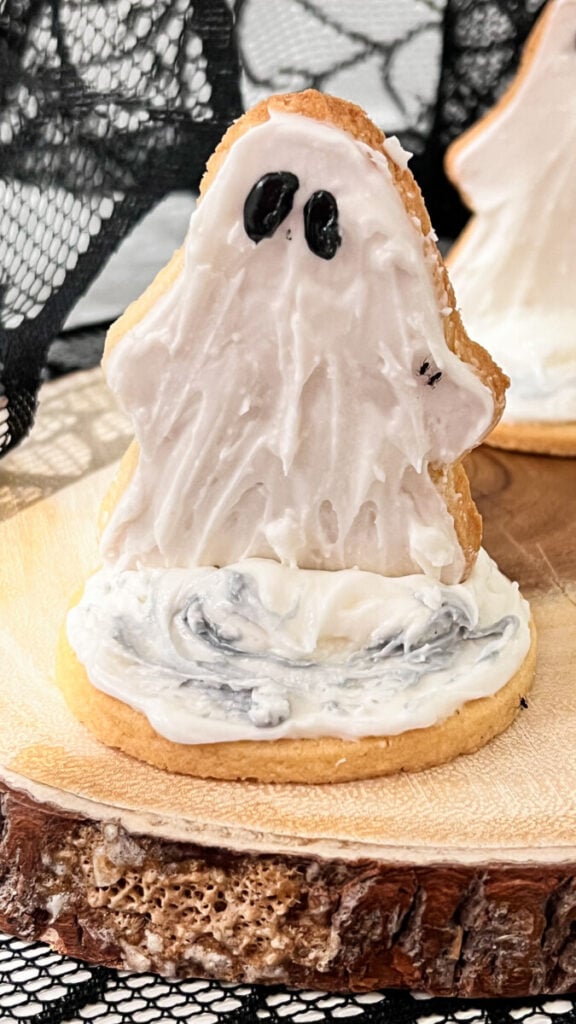
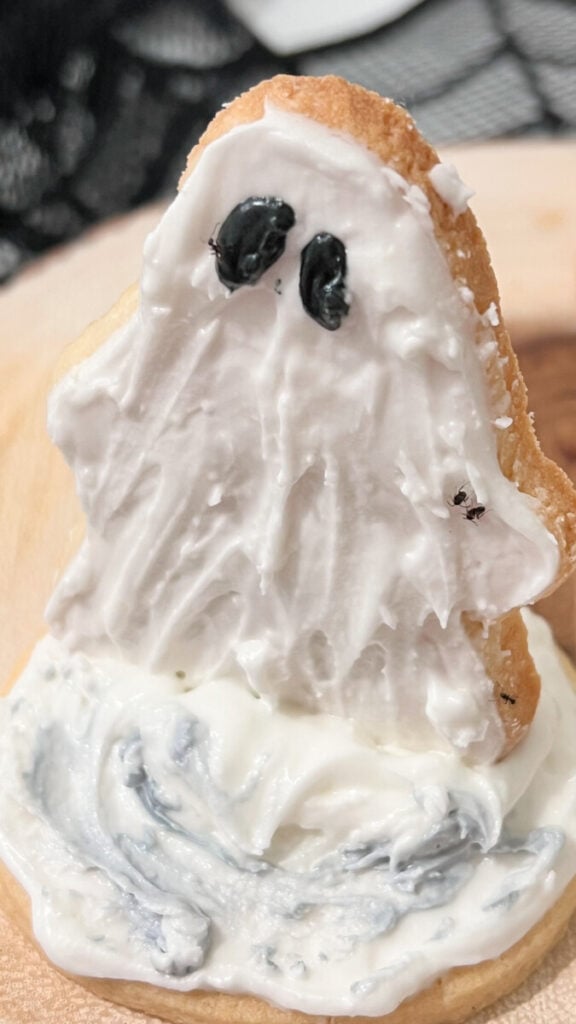
The ghost is decorated with rustic white royal icing and simple black eyes, giving it a charming handmade look that’s more sweet than scary. Once attached to the cookie base with thick royal icing, it stands upright to create the illusion of a little ghost floating across your Halloween table.
If you’re looking for a Halloween cookie that will truly wow your guests, this is the project to make.
Why You’ll Love These Standing Ghost Cookies
- Adorable 3D Halloween cookie design.
- Perfect for Halloween parties.
- Beginner-friendly decorating.
- Rustic royal icing is easy to create.
- Makes an incredible dessert table centerpiece.
- Kids absolutely love these standing cookies.
- Great for cookie gift boxes and bake sales.
- A unique design that’s sure to impress.
Jennie’s Thoughts
Sometimes the simplest cookie ideas become my favorites. I wanted to create a ghost that looked like it had floated right off a vintage Halloween postcard, and standing it on a round cookie base completely transformed the design.

I love the soft, textured royal icing because it gives the ghost an old-fashioned, handmade feel instead of looking perfectly smooth. Every little ghost ends up with its own personality, and seeing a whole tray of them standing together always makes me smile. They’re whimsical, nostalgic, and exactly the kind of Halloween cookie I love creating.
Supplies You’ll Need
- Ghost-shaped sugar cookies (about 4 inches tall)
- Round sugar cookies for the bases
- White royal icing
- Black royal icing
- Piping bags
- Small round piping tip
- Scribe tool
- Cookie turntable (optional)
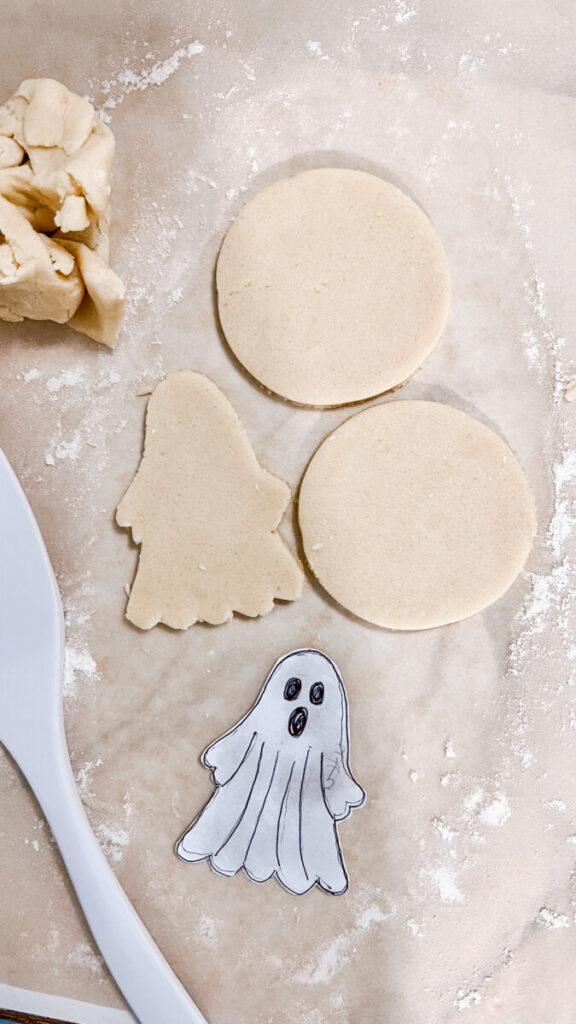
Step 1: Bake the Cookies
Bake one batch of ghost-shaped sugar cookies and one batch of round sugar cookies that will serve as the bases. Allow the cookies to cool completely before decorating.
Step 2: Decorate the Ghost
Flood each ghost cookie with white royal icing. Instead of smoothing the icing completely, leave soft waves and texture to resemble flowing ghost fabric.
Allow the icing to dry overnight.
Step 3: Add the Face
Using black royal icing, pipe two simple oval eyes. You can also add a tiny smile or leave the ghost expressionless for a classic vintage look.
Step 4: Prepare the Base
Flood the top center of each round cookie with a generous mound of thick white royal icing. This icing acts as the “glue” that will hold the ghost upright.
Step 5: Stand the Ghost
Carefully press the bottom edge of the ghost cookie into the fresh royal icing on the round cookie base. Hold it in place for several seconds until it begins to stand on its own.
Allow the cookies to dry completely before moving or packaging them.
Decorating Tips
- Use extra-thick royal icing to secure the ghost.
- Let the ghost cookie dry completely before assembling.
- Don’t smooth the white icing too much—the texture gives the ghost movement.
- Make the ghost about 4 inches tall for the best proportions.
- Allow the assembled cookie to dry overnight before transporting.
Fun Variations
Once you’ve mastered the basic standing ghost, try adding fun accessories:
- Tiny orange pumpkin bucket
- Witch hat
- Black bow tie
- Pink cheeks
- Little “BOO!” sign
- Mini candy corn
- Black cat beside the ghost
- Airbrushed gray shading around the edges
These simple additions make every ghost unique while keeping the overall design charming and whimsical.
Frequently Asked Questions
Will the ghost stay standing?
Yes! As long as you use thick royal icing and allow the cookies to dry completely, the ghost will remain securely attached to the cookie base.
Can I make these ahead of time?
Absolutely. Once fully dry, these cookies can be made several days in advance and stored in a single layer in an airtight container.
Do I need special cookie cutters?
A standard ghost cookie cutter and a round cookie cutter are all you need to create this design.
More Halloween Cookie Ideas
If you loved these Standing Ghost Halloween Cookies, be sure to check out my Vintage Ghost Halloween Cookies, Black Cat Halloween Cookies, Trick or Treat Halloween Cookies, How to Airbrush Sugar Cookies, and my collection of 50+ Halloween Cookie Ideas for even more festive inspiration.