Spooky Mummy Cookies
Spooky Mummy Cookies
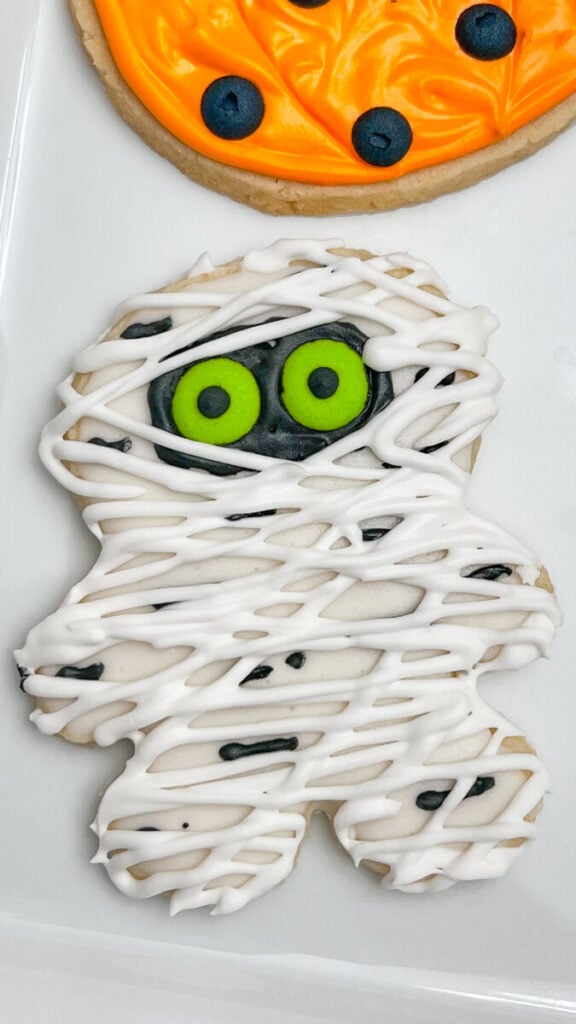
These Spooky Mummy Cookies are such a fun Halloween cutout cookie to make for October! Buttery sugar cookies are decorated with black and white icing to look like little wrapped mummies, then finished with bright green eyes that peek out between the mummy bandages.
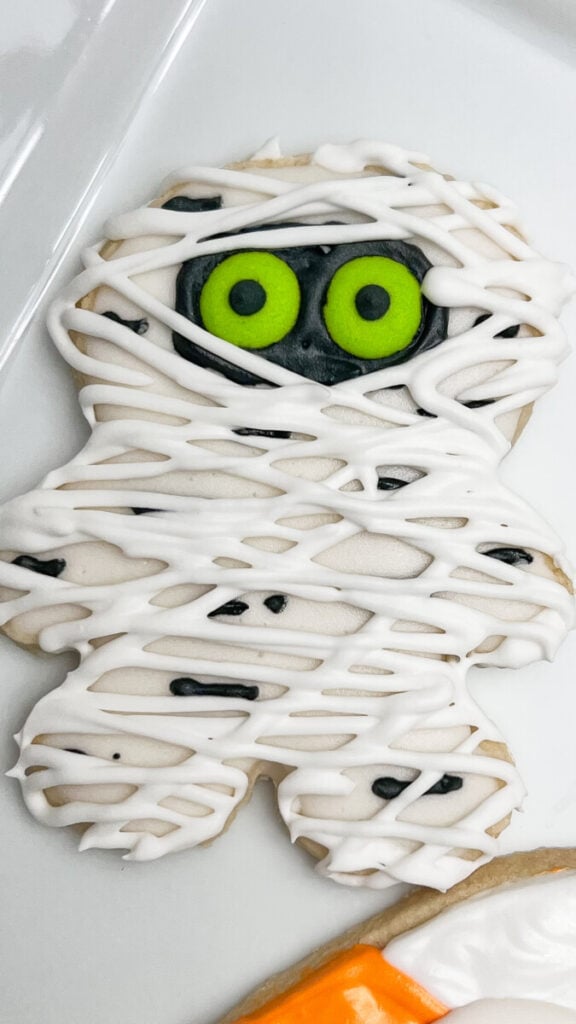
For the eyes, I made green icing dot transfers ahead of time, let them dry completely, and added a small black center to create that wide-eyed spooky look. The bright green against the black icing makes the eyes really stand out.
These mummy sugar cookies are perfect for Halloween parties, spooky cookie platters, classroom treats, or a Halloween baking day at home.
Spooky Mummy Cookies Recipe
Servings: About 18–24 cookies
Prep Time: 30 minutes
Bake Time: 8–10 minutes
Decorating Time: 45 minutes
Drying Time: Several hours or overnight
Ingredients
For the Cutout Sugar Cookies
- 1 cup unsalted butter, softened
- 1 cup granulated sugar
- 1 large egg
- 2 teaspoons vanilla extract
- ½ teaspoon almond extract, optional
- 3 cups all-purpose flour
- ½ teaspoon baking powder
- ½ teaspoon salt
For the Meringue Powder Icing
- 4 cups powdered sugar
- 3 tablespoons meringue powder
- 5–6 tablespoons warm water, plus more as needed
- 1 tablespoon light Karo syrup
- 1 teaspoon vanilla extract
- White gel food coloring, optional
- Black gel food coloring
- Bright green gel food coloring
Make the Green Icing Eye Transfers
I made the mummy eyes ahead of time using icing transfers. This makes decorating the cookies much easier and gives all of the mummies those cute, dimensional eyes.
Prepare a small amount of icing and tint it a bright Halloween green.
Place the icing into a piping bag and pipe round green dots onto parchment or wax paper. Make two dots for each mummy cookie, plus a few extras in case any break.
Add a small black dot to the center of each green eye.
Let the icing eyes sit until they’re completely dry and firm. I like to make icing transfers ahead of time and allow them to dry overnight.
Once dry, carefully peel them from the paper and keep them somewhere dry until you’re ready to decorate.
Make the Cutout Sugar Cookies
Preheat the oven to 350°F and line baking sheets with parchment paper.
Cream the softened butter and sugar together until light and fluffy.
Beat in the egg, vanilla, and almond extract, if using.
In a separate bowl, whisk together the flour, baking powder, and salt.
Gradually add the dry ingredients to the butter mixture and mix until a soft dough forms.
Roll the dough approximately ¼-inch thick on a lightly floured surface.
Use a mummy or gingerbread-person-shaped cookie cutter to cut out the cookies. Transfer them to the prepared baking sheets.
Bake for 8–10 minutes, or until the cookies are set and just beginning to turn lightly golden around the edges.
Cool completely before decorating.
Make the Cookie Icing
Combine the powdered sugar and meringue powder in a mixing bowl.
Add 5 tablespoons warm water, the Karo syrup, and vanilla. Beat until the icing is smooth and glossy.
Add additional water a teaspoon at a time as needed to reach the desired consistency.
Divide the icing, keeping most of it white and coloring a smaller portion black.
The Karo syrup gives this icing a beautiful finish while helping it have a slightly softer bite once dry.
How to Decorate Mummy Cookies
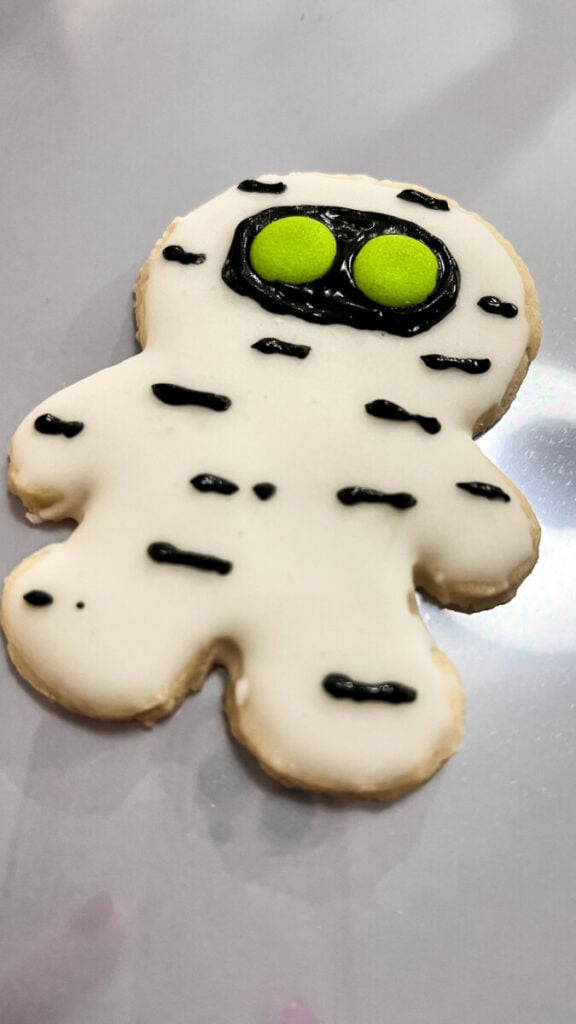
Start by adding a section of black icing around the mummy’s eye area. This dark background is what makes those neon-green eyes really pop.
While the black icing is still wet, carefully place two of your dried green icing eye transfers onto the black icing.
Let the eye area set slightly.
Now it’s time for the mummy bandages.
Place the white icing in a piping bag and snip a small opening from the end. Pipe lines of white icing back and forth across the cookie in different directions.
Don’t try to make the lines perfect! Some should overlap, some can run diagonally, and others can cross over one another. The irregular pattern is what makes them look like mummy wrappings.
Just make sure you leave those big green eyes peeking through.
Continue piping the white icing over the mummy’s head, body, arms, and legs until you’re happy with the amount of wrapping.
Allow the finished cookies to dry completely before storing or packaging.
Why Use Icing Transfers for the Eyes?
Making the green eyes as icing transfers is an easy way to create the same dimensional eye design on every mummy.
You can make a whole sheet of them at once, let them dry, and have them ready when it’s time to decorate.
I always recommend making extras. Tiny icing decorations can occasionally break when you remove them from the paper, so having a few extra eyes makes decorating much easier.
Decorating Tips
Use gel food coloring for the brightest green and deepest black without thinning your icing.
If your white icing isn’t flowing easily enough to make the mummy wrappings, add water just a few drops at a time.
You also don’t want perfectly straight bandages. Pipe them quickly in different directions and let some overlap. The messier pattern actually makes the mummy look better.
For an extra spooky look, make the green eyes slightly different sizes or position the black pupils a little off-center.
Make Them Ahead
The sugar cookies can be baked ahead and stored in an airtight container until you’re ready to decorate.
The green icing transfers can also be made several days ahead. Just keep them completely dry until you’re ready to use them.
After decorating, allow the mummy cookies to dry for 6–8 hours or overnight before stacking or packaging them.
Jennie’s Thoughts
These little mummies might be one of my favorite cookies on the Halloween tray because of those huge bright green eyes peeking through the white mummy wrapping.
I also love that the mummy design doesn’t need to be perfect. The white icing is supposed to overlap and go in different directions, so every mummy ends up looking a little different.
Put these next to the orange polka dot pumpkins and the black-and-white striped pumpkins, and you’ve got such a cute Halloween cookie collection.